Views: 5 Author: Site Editor Publish Time: 2024-08-13 Origin: Site


Installing SPC flooring can be an exciting DIY project that adds a fresh, modern look to any room. To install SPC flooring, you'll need a few essential tools and the right preparation to ensure the best results. You'll be pleased to know that SPC flooring is designed with a rapid-lock click system, making the installation process straightforward and adhesive-free.
Before we dive into the installation steps, let’s discuss why SPC flooring is an excellent choice. SPC, or Stone Plastic Composite, flooring offers incredible durability due to its blend of limestone and stabilizers, making it resistant to impact and wear. Whether you're dealing with a busy household or a high-traffic commercial space, SPC flooring stands up to the challenge, maintaining its beauty and functionality over time.
Preparation is key when installing SPC flooring. Ensure your subfloor is clean, dry, and free from any imperfections. This might involve sanding down high spots or using a moisture meter to check for potential dampness. Taking the time to properly prepare the floor will save you headaches down the road and ensure your new SPC floor lays perfectly flat.
Proper toolset and preparation are essential for SPC flooring installation.
SPC flooring is durable and ideal for high-traffic areas.
Carefully prepare the subfloor before installation.
Getting ready to install SPC flooring requires careful planning and attention to detail. Let's dive into the preparations we need to make to ensure a smooth installation.
First things first: the subfloor. This is the foundation, and it has to be absolutely perfect. The subfloor must be smooth, dry, and clean. A level surface ensures that the SPC tiles sit correctly without any wobbling or gaps.
Consider using a leveling compound if you find any uneven areas. Also, remove any old adhesive residues to prevent them from interfering with the new installation. A clean subfloor makes a big difference in the final look and longevity of your flooring.
Measuring the room accurately is a critical step. Grab a tape measure and note down the length and width of the room. Don’t forget to account for any alcoves, doorways, and other irregularities. Accurate measurements prevent wastage and ensure that you buy the right amount of SPC flooring.
We recommend creating a rough sketch of your room with the dimensions noted. This sketch will be super helpful when you lay out your flooring later on. Double-check your measurements just to be safe; it's better to be precise than sorry!
Remove any obstacles that might get in the way. This includes furniture, rugs, and any other items cluttering the space. Clear the entire area so that you can work efficiently.
Also, check for any nails, screws, or other protrusions that might be sticking out of the subfloor. Removing these obstacles ahead of time will make your installation process much smoother and faster.
SPC flooring, like other types of flooring, is sensitive to the environment. It’s best to install SPC flooring when the room temperature is between 2°C and 40°C. These temperature ranges ensure that the flooring material remains flexible and easy to work with.
Humidity is another factor to consider. Aim to install your flooring in a room where humidity levels are relatively stable. Drastic changes in temperature or humidity can cause expansion or contraction, affecting the integrity of your flooring.
Before you start installation, allow the SPC flooring to acclimate to the room. Store the planks flat and leave them in the installation room for at least 24 hours.
Don't skip this step! Acclimating ensures that the flooring adapts to the room’s temperature and humidity, reducing the risk of issues like gaps or buckling later on. Leave them in the packaging to prevent any damage during this period.
Preparation isn’t just about the floor; it’s also about having the right tools on hand. You’ll need a tape measure, utility knife, tapping block, hammer, leveling compound, and a pencil.
Having all your tools within reach can save you plenty of time and frustration. Also, make sure your tools are in good condition. A dull utility knife, for instance, can cause uneven cuts, leading to poor tile placement.
Always check with your SPC flooring supplier for any specific guidelines or recommendations for installation. Different suppliers may have varying requirements, and it's essential to adhere to them for the best results.
If your supplier offers a warranty, read through it carefully. Sometimes, failure to follow specified installation guidelines can void the warranty. Better safe than sorry!
Before laying down any tiles, mark your layout. This involves determining where you’ll start and how you’ll proceed. Use a chalk line to create a reference line; this will guide you as you place each tile.
Deciding on a layout in advance also helps you visualize how the finished floor will look. A good layout can make the room appear larger and ensure the tiles are aligned perfectly.
Safety first! Make sure your work area is safe. Clear away any potential hazards and wear appropriate safety gear like gloves and safety glasses.
Keep a first-aid kit nearby just in case. Ensure your workspace is well-lit to prevent any accidents. By preparing a safe environment, you can focus better on the task at hand and avoid injuries.
Alright, let's chat about how we should store and handle our SPC flooring to keep it in tip-top shape.
First things first, always store your SPC flooring flat. Trust us, this is super important. If you store it upright, it might warp—and nobody wants that kind of headache! Find a dry, climate-controlled area; we don't want any moisture sneaking in and causing problems down the line.
Temperature matters too! Keep your flooring in a place where the temperature remains between 2°C and 40°C. It’s kind of like taking care of a pet—extreme cold or heat just won’t do.
Got a lot of flooring? Avoid stacking it more than 1 meter high. Stack it any higher and the weight can start to damage the bottom layers.
When it comes time to move the planks, handle them like a stack of your favorite vinyl records. Be careful not to bend or drop them—you want to avoid any unnecessary damage before they even hit the floor.
Remember these tips, and your SPC flooring will thank you, looking great for years to come!
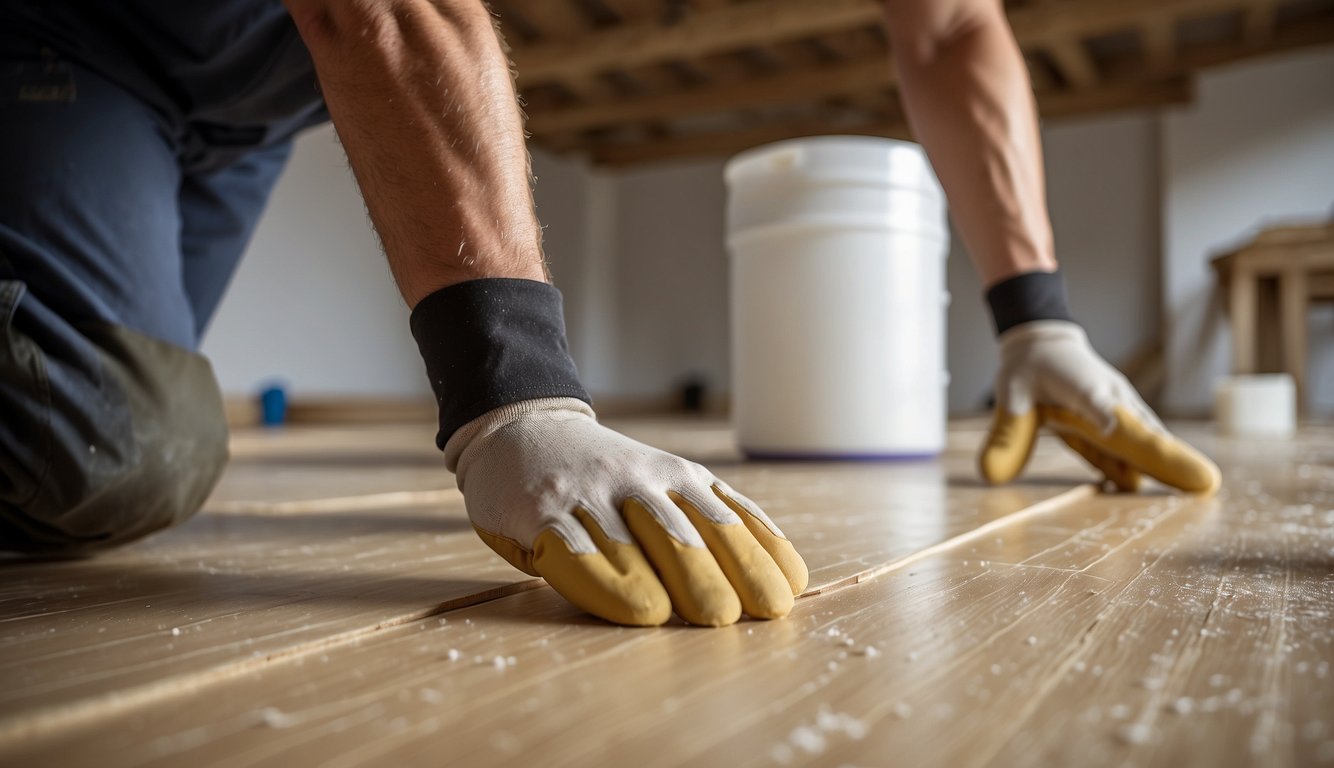
Let's get our hands dirty with wood subfloor preparation! Ensuring your wood subfloor is in top shape is crucial before installing SPC flooring. Here's what we need to do:
First, make sure the subfloor is structurally sound. No one wants a squeaky floor, right? Nail or screw down any loose areas, especially every 6 inches. This step ensures a stable surface for our SPC planks.
Next, check for high and low spots. Sand down any high areas. Got some uneven spots? Fill those with a leveling compound—trust us, it's worth the effort for a smooth installation.
Moisture is our enemy! If we suspect moisture issues, it's best to install a moisture barrier. This helps protect our beautiful SPC flooring from potential damage.
Here's a quick checklist:
Check structural integrity: Secure loose areas.
Sand high spots: Ensure an even surface.
Fill low spots: Use a leveling compound.
Install a moisture barrier: Prevent moisture damage.
Ready to get started? Let’s make that subfloor perfect for our SPC flooring!
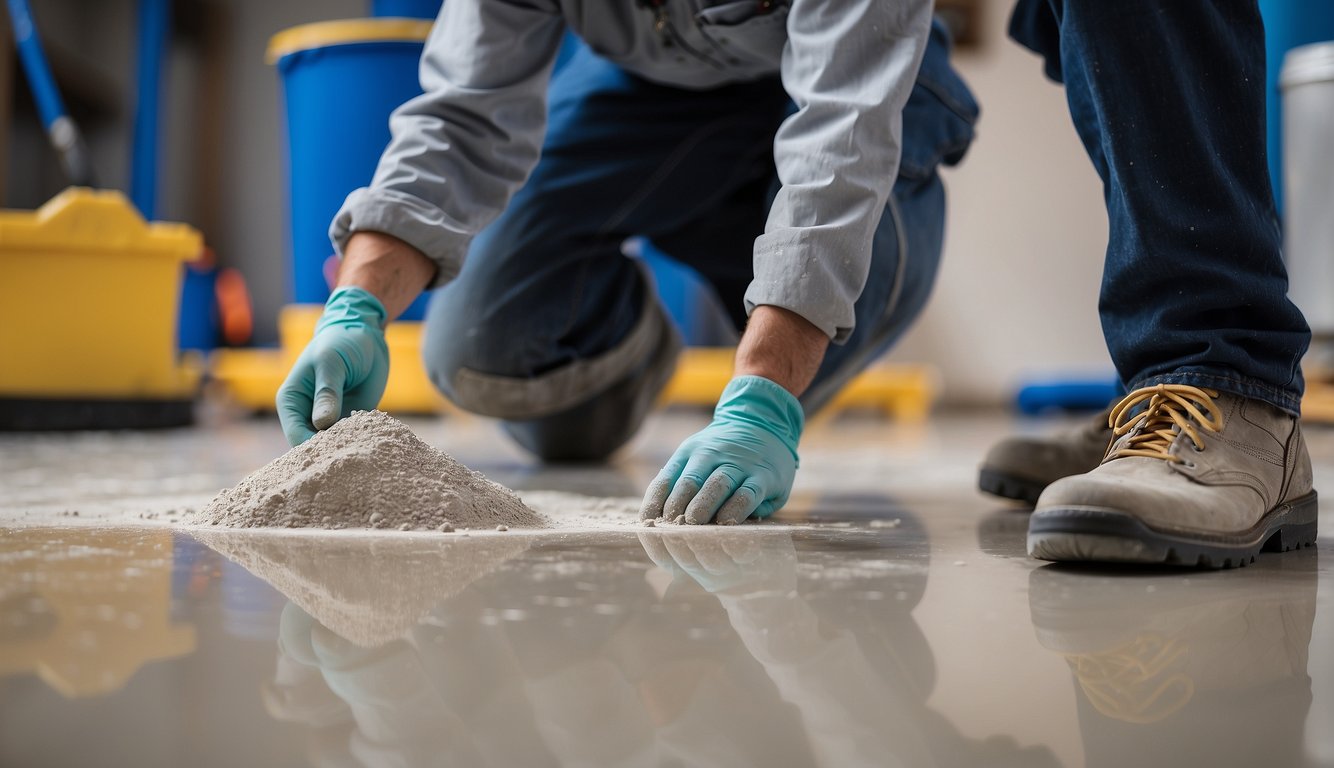
Preparing a concrete subfloor for SPC flooring is easier than you might think. Let's dive right into it!
First, make sure your concrete is dry and crack-free. Moisture can wreak havoc on your new floor. A simple trick is to tape a piece of clear plastic to the concrete for 24 hours. If condensation appears, it's too damp.
Next, apply a 6 mil polyethylene moisture barrier. This barrier is crucial when installing the SPC flooring over concrete. It acts as a shield, protecting your flooring from potential moisture rising from the subfloor.
Is your concrete uneven? No worries! Use a self-leveling compound to ensure a flat surface. Even minor deviations like bumps or dips can affect the SPC locking mechanism. Aim for a surface flatter than 1/8" over 10 feet.
In summary:
Dry concrete: Check with the plastic test.
Moisture barrier: 6 mil polyethylene.
Flat surface: Self-leveling compound if needed. Ensure flatness of 1/8" over 10 feet.
Prepping the concrete subfloor might feel like a chore, but trust us, it's worth it. After all, a solid foundation means fewer headaches down the road!
Installing SPC flooring is a pretty straightforward process when you've got the right tools on hand. Let’s walk through the essentials you need for a successful installation.
1. Tape Measure: This is crucial for taking accurate measurements of your space to ensure you cut your flooring pieces correctly.
2. Utility Knife: We'll need this sharp tool to make precise cuts on the SPC planks. A new blade helps get cleaner edges.
3. Tapping Block: This handy block helps us to gently tap the planks into place without damaging the edges.
4. Rubber Mallet: Used alongside the tapping block, the rubber mallet helps secure the planks together snugly.
5. Spacers: These little guys maintain a consistent gap between the flooring and the walls. This gap is essential as it allows for proper expansion and contraction of the flooring.
6. Moisture Barrier: A moisture barrier is critical to protect the flooring from any dampness that might seep up from the subfloor.
7. Underlayment: If the SPC flooring doesn’t already come with an attached underlayment, we'll need to lay this down first to provide cushioning and reduce sound.
8. Chalk Line: This is perfect for snapping straight lines to guide our plank placement.
9. Safety Gear: Don't forget to protect ourselves! Gloves will keep our hands safe from cuts, and knee pads will make kneeling more comfortable during installation.
We've got our tools ready, and with these in hand, we can ensure our SPC floor installation goes smoothly. Happy flooring!
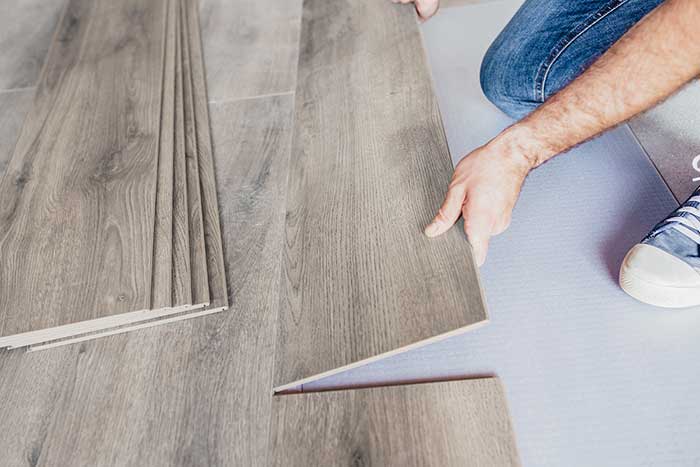
Alright folks, let's roll up our sleeves and get this SPC flooring installed! It’s not as daunting as it sounds. Ready?
First, start from the left corner of the room. Trust me, it’s the easiest way to ensure everything lines up correctly.
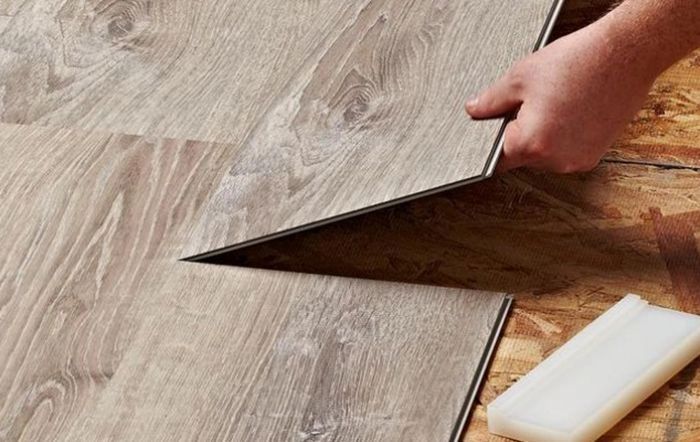
Lay the first row of planks with the tongue side facing the wall. The tongue fits snugly into the groove, just like putting together a jigsaw puzzle!
Don't forget to use spacers to maintain a 1/4" expansion gap around the perimeter. This gap allows the tiles to expand and contract with changes in temperature and humidity.
To join the planks, click them together. Use a tapping block and rubber mallet to ensure a tight fit without damaging the planks.
Measure and Cut: Double-check your measurements before cutting each plank. Save yourself the headache of wasted tiles.
Secure the First Plank: Place it carefully and tap it lightly for perfect alignment.
Continue Laying Planks: Click each new plank into place, working row by row.
Feel free to take a break and admire your progress. DIY doesn’t mean rushing!
If you're installing in multiple rooms, use T-moldings to separate rooms. This prevents gaps and maintains a seamless look.
Avoid installing base or island cabinets on top of the flooring. Instead, install all base cabinets first. This ensures the floor can expand and contract freely without obstacles.
In no time, we’ll have a beautiful floor that we'll love to walk on every day!
Installing SPC flooring with the Uniclic system is a breeze! The Uniclic technology allows the panels to click together without glue. Below, we cover two main methods to get those floors looking fantastic.
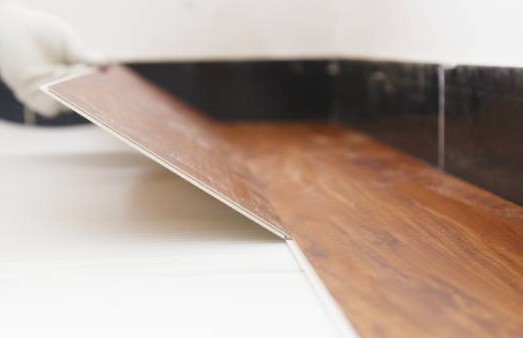
In Method A, we start by holding the panel to be installed at a 20-30° angle. Position it next to the already-installed panel. While holding the new panel in place, gently press down and gradually lower it. The panels should click together easily, thanks to the unique tongue-and-groove design.
We need to maintain a bit of pressure to ensure the joints lock securely. It’s important not to force the panels too hard as this can damage the grooves. If we need more alignment, a tapping block and hammer can be used gently.
Make sure to start from the left corner of the room and work our way out. This method works great for getting a tight fit and is particularly effective when working in smaller spaces.
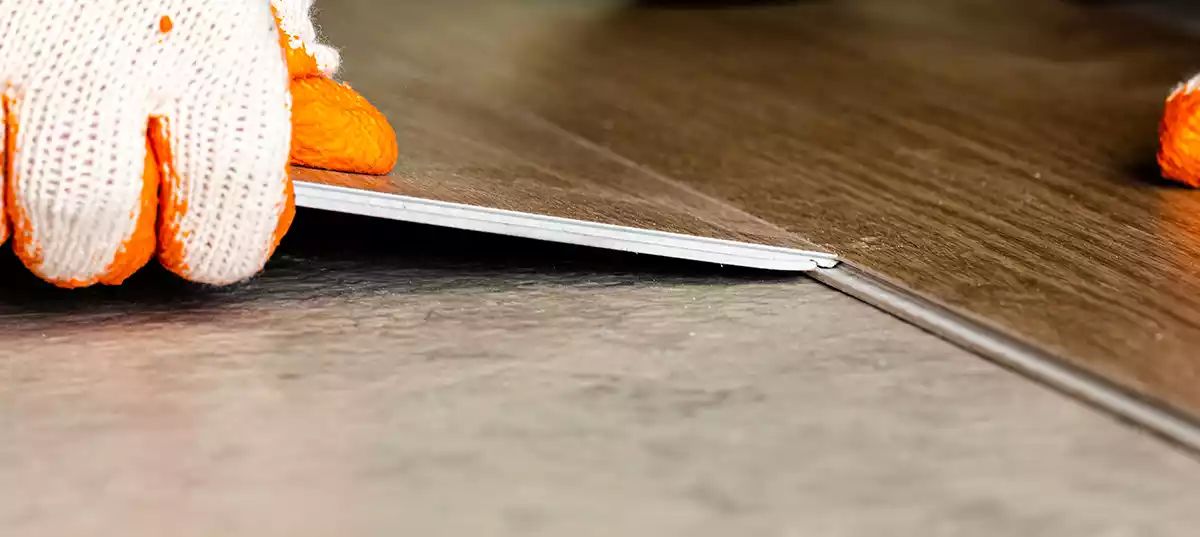
Method B is the horizontal snapping technique. We begin by aligning the new panel perfectly with the edge of the already-installed panel. Instead of angling it, we place it flat on the floor next to the adjacent panel.
Next, we use a tapping block to gently tap the edges until the panels click into place. It’s crucial to tap evenly along the edge to avoid damaging the panels. This method is a bit quicker and works well in larger areas where maneuvering the panels is easier.
Horizontal snapping is particularly beneficial for very long runs or in extensive open spaces. It offers the same tight fit but with a different approach, giving us flexibility based on our room’s layout.
By following these steps, our SPC flooring installation with the Uniclic system will be smooth and efficient!
Alright, let's get into the nitty-gritty of installing SPC flooring!
First things first, make sure you've got all your tools and materials ready. You’ll need:
Measuring tape
Utility knife
Spacers
Rubber mallet
Tapping block
Prepare the Subfloor Ensure the subfloor is clean, dry, and level. Any moisture issues should be addressed beforehand.
Acclimate the Planks Leave your SPC flooring in the room where it’s to be installed for at least 48 hours. This helps the material adjust to the room’s temperature and humidity.
Lay Down a Moisture Barrier If installing over concrete, a 6 mil polyethylene moisture barrier is essential. This prevents any moisture from seeping through and damaging the flooring.
Begin with the First Plank Start in a corner, aligning the planks with your reference line. Place spacers between the plank and wall to maintain a 1/4" expansion gap.
We’ll continue laying planks row by row. Make sure each row’s seams are staggered by at least 6 inches. This not only looks better but also provides stability.
Each time you reach the end of a row, measure and cut the last plank to fit. Don’t forget to leave that important 1/4" expansion gap!
Use a rubber mallet and tapping block to ensure each plank clicks together securely. Pay attention to the reference line and adjust as needed to maintain a straight layout.
After all planks are installed, remove the spacers and install baseboards to cover the expansion gaps. Now, admire your handiwork. Doesn’t a neatly laid floor feel just satisfying?
We’ve pretty much done the hard work. Ready to tackle your SPC flooring project? Let’s go!
After laying down your SPC flooring, it's important to handle the final touches to ensure a professional and polished look. This includes taking care of areas around base moldings, doorways, and pipes. Let's break down each aspect so you can finish the job like a pro.
Base molding is the trim that goes around the perimeter of the room where the floor meets the walls. This is more than just decorative; it covers the small gap left for floor expansion.
First, remove any spacers that were placed during installation. Then, position the base molding so it rests snugly against the SPC flooring.
Use a nail gun to drive the fasteners into the wall, not the floor, to allow the flooring to expand and contract freely. Always ensure you leave about a 1/4-inch gap between the floor and the molding to account for this movement.
Taking these steps ensures that the final outcome looks clean while maintaining functionality.
Installing SPC flooring under doorframes requires precision to get that seamless look. Start by undercutting the door jambs to the thickness of the SPC flooring.
This means you'll need a handsaw or oscillating tool to cut the bottom of the doorframe so that the flooring can slide underneath. It’s vital for maintaining a smooth transition between rooms.
After cutting, slide the SPC tiles under the frame and use a tapping block to make sure it fits tightly. This method ensures a seamless look without any unsightly gaps.
Remember that patience and attention to detail are key to getting this right.
When you have pipes coming out of the floor, you'll need to cut the SPC flooring to fit around them seamlessly. Begin by measuring the pipe’s diameter and mark this measurement on the SPC tile.
Using a jigsaw, carefully cut out the marked circle. It’s often recommended to cut a small wedge from the tile to make it easier to fit.
Once in place, use silicone sealant around the pipe to create a waterproof seal. This part is particularly crucial in areas prone to moisture, like kitchens or bathrooms.
This ensures that the floor remains intact and maintains its aesthetic while also preventing water damage.
Let's tackle some questions you might have about installing SPC flooring. We'll cover the steps for different areas of your home, share tips for a flawless finish, and give you a heads-up on the tools and prep work needed.
First, ensure your concrete floor is clean, dry, and level. Apply a moisture barrier if necessary. Start by placing spacers along the walls. Lay the first plank against the wall, and continue laying subsequent planks, locking them into place. Use a tapping block to tighten seams, and trim planks as needed.
Bathroom installation requires extra attention to moisture. Make sure the subfloor is dry and use a water-resistant underlayment. Seal the edges with waterproof caulk to prevent water infiltration. Use precision cuts around fixtures and make sure all seams are tightly locked.
Let the flooring acclimate for at least 24 hours in the room where it will be installed. Keep the temperature between 2°C and 40°C. Ensure your subfloor is level and clean. Lay the first row along the longest wall and use spacers to maintain a gap for expansion. Lock the planks together firmly.
Start by measuring and cutting the planks to fit each step. Use a strong adhesive to fix the planks directly onto the stairs. Secure the nosing piece at the edge of each step for a finished look. Make sure each piece is firmly attached to avoid any slipping hazards.
You'll need a tape measure, spacers, tapping block, rubber mallet, saw, utility knife, moisture meter, and safety gear like gloves and goggles. A sanding tool can be handy for leveling high spots, and a vacuum or broom will keep your workspace clean.
A good underlayment can help with sound absorption and moisture protection. Choose one that's compatible with SPC flooring. If you're installing over concrete, a moisture barrier is essential. This will help extend the life of your flooring and ensure a smooth installation process.
We hope this FAQ section helps you navigate your SPC flooring installation with confidence. Happy flooring!